Showing posts with label recipes. Show all posts

Sunday, December 14, 2014

Tour of Homes + Red Velvet Cheeseball Recipe

I organized a Tour of Homes for our church.  It was tonight, and we had a blast.  Our house was on the tour, and it is just so much fun to have people over to enjoy Christmas decor and holiday food.  To see our Christmas decor, you can click here for Part 1 and Part 2.

We had at least 50 people come and go tonight, and it was really enjoyable to visit with so many from our church family.  Since there were five homes total on the tour, we each put out just a couple of snacks for people to enjoy.  I made spinach dip (a pretty standard recipe that is always delicious) and a red velvet cheeseball.  I found this recipe on Pinterest last Christmas, and it had been a hit every time I had made it.


Red Velvet Cheeseball

8 oz cream cheese, softened
1 stick of butter, softened
1 1/2 cups red velvet cake mix
1/2 cup powdered sugar
2 Tbsp brown sugar
1/2-3/4 cup mini chocolate chips

Combine all ingredients but the chocolate chips.  Roll into a ball, wrap in plastic wrap, and refrigerate for 2 hours.  Then roll the cheeseball in the mini chips.  Put it back in the refrigerator and chill until you are ready to serve it.  (Two hours is not long enough for it to totally set.  It needs at least two more hours to be hard enough to serve.)  Serve with Nilla Wafers or graham crackers.  I used the mini Nillas which were super cute and made each serving bite-sized.

Enjoy!

Wednesday, November 26, 2014

Momfessionals Recipe Club {Squash Casserole}

With Thanksgiving coming tomorrow, I decided to share my favorite holiday dish with you.  Paula Deen's Squash Casserole is a staple side dish with my family for Thanksgiving and Christmas.  It is easy, delicious, and a must have for any holiday meal or church pot luck as far as I am concerned.  I will start by giving you Paula's official recipe from her original The Lady & Sons Savannah Country Cookbook.  Then I will share the pictures and my personal input since I very rarely make a recipe exactly as it says to!

Squash Casserole

1 large onion, chopped
4 Tbsp butter
3 cups cooked squash, drained with all water squeezed out
1 cup crushed Ritz crackers, plus additional for topping
1/2 cup sour cream
1 tsp House Seasoning (see below)
 1 cup grated Cheddar cheese

Preheat oven to 350.  Saute onion in butter for 5 minutes.  Remove from pan and mix all ingredients together.  Pout into buttered casserole dish and top with cracker crumbs.  Bake for 25-30 minutes.

House Seasoning

1 cup salt
1/4 cup black pepper
1/4 cup garlic powder

Mix well and store in an air tight container.

So here is my take on Paula's Casserole.  I really don't measure anything any more since I have made this so many times.  The main difference in my way and her way is that I leave out the onion.  I like onion just fine, but I don't like the extra step of chopping and cooking it.  lol


I used 7 medium sized squash to make my casserole this time and it was the perfect amount.  I slice them about 1/4" thick, put them in a dutch oven and boil them until they are fork tender.

 
When they are cooked, I drained them and begin mashing them with a potato masher while they are still in the colander to get some of the water out.  Then I transfer them back to the dutch oven to finish smashing them.


I add in the cheese first so that the hot squash can melt it.  Then I add in the sour cream, House Seasoning, and cracker crumbs.


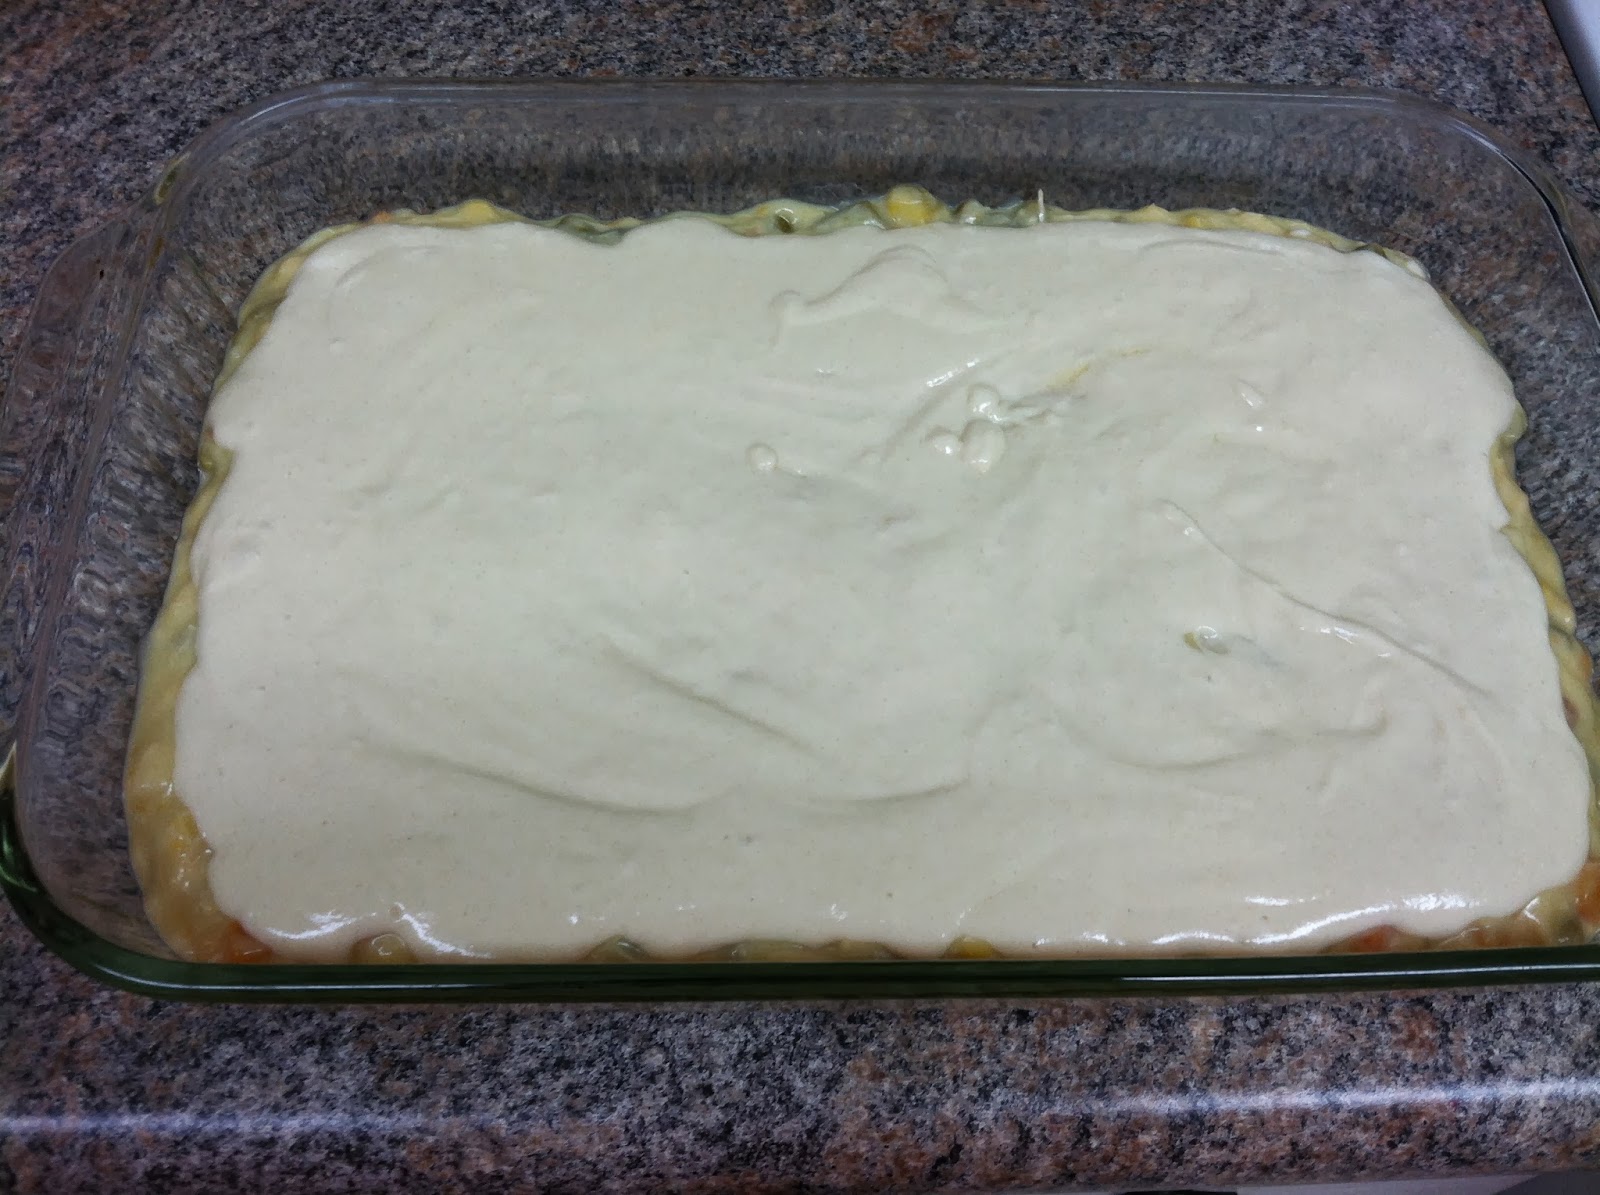
I have always used my oval baker from Pampered Chef to make this casserole.  It fits the dish perfectly and the stoneware helps it stay warm longer.  So I pour it in and top it with some extra cheese.  If you are making your casserole ahead of time (like me) this is wear you would stop, cover it with foil, and put it in the fridge until you are ready to bake it.


Tomorrow, I will take it out of the fridge, uncover it, top it with the cracker crumbs, and bake it for about half an hour--until it is hot and a little bubbly.  I have found that if I put the cracker crumbs on it before putting it in the fridge, they get soggy and just don't crisp up and get brown like they should.  I will update this post with a picture of the finished product after our Thanksgiving meal tomorrow.  Enjoy!

Whatever you are serving tomorrow, I hope you have a wonderful feast with family and/or friends.  Happy Thanksgiving!

Wednesday, October 29, 2014

Momfessional's Recipe Club {Crescent-Topped Cheeseburger Bake}

Have I got an easy-peasy, family-friendly meal to share with you today.  This is so yummy and so easy, you will be making it all the time, I promise.  I wish I could remember the original source for this recipe because I did not create it myself--I found it online one evening in a moment of desperately needing something new to make.  It has been a weeknight staple at our house ever since.  And of course, as most mom-cooks do, I have modified it to fit my family's size and taste preferences.

Crescent-Topped Cheeseburger Bake

1-1.5 lbs. ground beef
1/2 cup chopped onion
1/2 cup water
1/2 cup ketchup
1 Tbsp prepared mustard
Black pepper to taste
7 slices of American cheese
1 can crescent rolls
1 egg
Sesame seeds

Brown the ground beef with the chopped onions.  At this point you could add chopped bell pepper if you want--I abhor bell pepper, so I don't add it, but I think the original recipe called for it.  Drain and stir in the water, ketchup, mustard, and black pepper.  You may want to add a bit more ketchup depending on how much ground beef you are using.  Pour beef mixture into a greased 11 x 7 pan.  (I don't have a pan that size, so I use a 9 x 13 pan.)  Top with the American cheese.  I have found that I can fit two rows of 3.5 slices of cheese across the pan.  Roll out the crescents with a little flour so they will seal together and fit better in the pan.  Cut pieces of crescent roll to fill in the holes if necessary.  Brush with egg and sprinkle sesame seeds on top.  Bake at 350 for about 25 minutes until the filling is bubbly and the top is browned.


Viola!  Add a salad or an easy side like corn, green beans or peas, and you have yourself a great dinner for your family.  My kids LOVE this casserole and clean their plates of it every time I make it.


A few notes from the cook:  our family of four can easily eat this entire casserole, so don't count on having leftovers unless your crew is made up of light eaters.  I have been known to completely double the filling part of the recipe (using maybe 3/4 cup of water instead of a whole cup) just to add a bit more bulk to the recipe and make it more filling.  The original recipe also called for chopped pickles in the filling.  While my husband would love that, I don't like pickles, so I leave them out.  Pretty much any burger topping besides lettuce could be tossed into this filling and be pretty good.

Enjoy!

Be sure to link up your own recipe with the Momfessionals Recipe Club!


Saturday, October 25, 2014

Easy Sunday Lunch

In all honesty, our family usually goes out to a restaurant for lunch after church on Sundays.  BUT during the fall when the Hubs has to be at a football coaches meeting by 2:00, sometimes it's easier to us if I plan a lunch at home.  This can be tricky since we are at church until at least 12:30.  I usually do something in the Crock Pot, but I came across this easy recipe by Rachael Ray that, when mixed with some leftover lima beans and the easiest cookies in the world, turned out perfectly for a yummy, healthy Sunday lunch.


Winner Winner Chicken Dinner
Rachael Ray

1 cup basmati rice
2 cups chicken stock
1 lemon, thinly sliced
6 sprigs fresh thyme
1 whole chicken, 2.5-3 lbs.
Olive Oil
Salt and Pepper

Pour the rice into a 9 x 13 pan.  Add the chicken stock, lemon slices, thyme sprigs, and some salt and pepper, stir to combine.  Place chicken on top of rice, drizzle with olive oil and season with salt and pepper.  Roast in a 400 degree oven for one hour or until the chicken and rice are done.  Let the chicken stand for 5-10 minutes, carve and serve with the rice.

I could not find a chicken that small.  The one I cooked was about 4 lbs, so it had to cook for a little longer.  I should have put more stock in the rice because it dried out just a little, but it was still good!

Easy Peanut Butter Cup Cookies
Ree Drummond aka The Pioneer Woman

1 tube of Refrigerator Peanut Butter Cookie Dough
24 mini Reese's cups

Slice the cookie dough into 6 equal slices.  Cut each slice into quarters so you have 24 pieces of dough.  Put one piece of dough into each cup in a mini muffin tin.  Bake at 350 for about 6-8 minutes until the cookies are almost done.  Immediately after pulling them out of the over, press in a mini Reese's cup.  Allow to cool completely before removing the cookies from the muffin tin.

These can be done with pretty much any cookie dough with any mini-sized chocolate candy you like.  Ree's recipe is called Quick Candy Cookies because she had made them so many different ways.  My family enjoyed the cookies immensely.  However, I should have baked them for 10-12 minutes.  They were not completely done, so it was hard to eat them.  But who doesn't love cookie dough??

So, take a little time to prepare an easy Sunday lunch for you family!

Wednesday, September 24, 2014

Momfessionals Recipe Club {Italian Chicken}

Well, both kiddos are sick at my house--B started running a fever Saturday afternoon, C's fever started Sunday afternoon.  After trip to the doctor Monday, my suspicions were confirmed--it's a virus that we just have to wait out.  It's no fun, but it could be worse.  I am thankful that 95% of the time, my kids are happy, healthy, normal kids.

So with that being said, Monday meant laying around a lot after the 45 minute drive to the doctor, the hour at the doctor, and the 45 minute drive home.  When it came time for supper, I wanted something quick, easy, and good.  I had seen this recipe (if you want to call it that) on Pinterest ages ago and have meant to try it several times, but my plans always fell through.  Well, it all came together yesterday, and I must say, I was surprised at how delicious it was.  And, seriously it doesn't get any easier. 

Like I said, I found this recipe on Pinterest, but it didn't have a name.  Since the only ingredient in it aside from the meat and sides is an Italian dressing packet (and butter), I have decided to call it Italian Chicken.  Are you ready for the easiest weeknight dinner ever?


Italian Chicken

6 chicken breasts
1 lb (8-12) new potatoes, quartered
2 cans of green beans
1 stick of butter, melted
1 packet of Italian dressing mix

Lay the chicken in a row down the middle of a 9" x 13" dish.  Drain the green beans and put them on one side of the dish in an even layer.  Put the quartered potatoes in an even layer on the other side of the dish.  Pour over the entire stick of melted butter and sprinkle over the dressing mix.  Bake at 350 for 1 hour.

Yep, that's it.  So.  Easy.  And let me just say, the potatoes came out soft and flavorful, and the green beans were amazingly zesty and delicious.  But the chicken, heavens to Mergatroid, the chicken--it was tender enough to cut with a spoon and absolutely scrumptious.  In spite of feeling a little under the weather, B ate his entire plate of chicken and beans and wanted more.  (He does NOT eat potatoes, no matter how I present them--unless they are a french fry or a tater tot, of course.)

Grab the short list of ingredients for this easy supper, and make it on one of those busy nights when you need something quick and delicious for your family!  Enjoy!

Thursday, August 7, 2014

Pinterest Recipe Thursday {Mexican Biscuit Casserole}


It's been a while since I tried a Pinterest recipe.  In fact, with the busyness of this summer, it's been a while since I cooked!  So when I can across this, I thought it sounded pretty good--and it was.  And on top of that it was super easy, and my kids enjoyed it.


Sorry I have no idea why the picture is sideways!

Mexican Biscuit Casserole

1.5 lbs ground beef
1 packet taco seasoning
1/2 c water
1 can kidney beans, drained and reserve liquid
1 can Mexicorn, drained
3 c cheese, divided
1 can of refrigerated biscuits

Brown the ground beef and drain.  Add the taco seasoning and water.  (The original recipe calls more water, but most of the reviewers said it was too watery.)  Stir in the kidney beans and Mexicorn.   Add some of the reserved bean liquid if the mixture seems too dry.  Stir in half of the cheese and pour into casserole dish.  Top with canned biscuits and bake on 350 for 20 minutes.  Sprinkle the remaining cheese on top and let stand for 5 minutes.  Serve with sour cream, salsa, or other toppings.

I found that this was good but a little plain.  Once I added the sour cream to mine, it added a whole new level of flavor and was delicious!  The kids helped me make it which means they of course said they loved it!  Actually, B liked all but the kidney beans, and C mostly just ate the biscuit off the top!

Enjoy!

Thursday, April 24, 2014

Pinterest Recipe Thursday {Sweet Baby Ray's BBQ Chicken and Sour Cream Mini Biscuits}

Let me just start by saying, both of these recipes will be staples at our house from now on.  They are ridiculously easy and delicious!!  I had pinned both of these recipes eons ago and finally got around to testing the chicken one last week.  The biscuits I had made several months ago and thought they would go well with this meal.


Sweet Baby Ray's Crock Pot Chicken

1 bottle Sweet Baby Ray's BBQ sauce (I used original.)
1/4 cup vinegar
1 tsp red pepper flakes (I only used about 1/4 tsp.)
1/4 cup brown sugar
1 tsp garlic powder
4-6 chicken breasts (frozen is fine!!)

Combine the first five ingredients in a bowl.  Place the chicken in the crock pot.  Pour the sauce over the chicken and cook on Low for 4-6 hours.  Enjoy!  Here is the link for the site I pinned.

I love a crock pot recipe where I can use the chicken still frozen because I am notorious for forgetting to thaw meat!  Next time I make this (and believe me, there will be a next time) I will probably completely omit the red pepper flakes.  To me, the BBQ sauce had enough kick on its own.  But if you love heat, go for it.  It was a bit too much for me and my kids.

I didn't get a good picture of the chicken after it was cook because we dug in, but here is one of it a couple of hours into the cooking process.  Yummo!


I served this chicken with The Lady's Mac and Cheese from Paula Deen's The Lady and Sons cookbook, green peas (although I wish I had had some limas on hand), and Sour Cream Mini Biscuits.  It was a home run meal as far as I am concerned.

Sour Cream Mini Biscuits

1 cup butter, softened
1 cup sour cream
2 cups self-rising flour

Combine the ingredients in a mixer.  The dough may be a little dry, but it's ok.  Roll a rounded tablespoon of dough into a ball and drop it into the cup of a greased mini muffin tin.  Bake at 450 for 10-12 or until golden brown.  Here is the link to the original pin.

I love using my Pampered Chef small scoop for these.  It makes rolling them into balls easier.  You can get about 40 mini biscuits from this recipe.  It is such an easy way to add a bread to your meal--which is not something I do often, but it's nice every now and then.


I really wish I had snapped a picture of the whole meal because it was seriously yummy, but alas, I was so engrossed in eating the deliciousness that I completely forgot.  I hope you will give these a try.  Enjoy!

Thursday, April 17, 2014

Pinterest Recipe Thursday {Smothered Chicken}

Once again, this is not actually a recipe that I found of Pinterest, but it is worth sharing.  It is the crowd-pleasing and super easy Smothered Chicken recipe that I promised you last week.  I got this from a lady at our church who grew up Mennonite which basically means that you would eat and love every.  single.  thing.  she cooks.  Once of the things that I love about this is there is no measuring or complicated ingredients.  Just put however much you want.  So here goes:

Smothered Chicken

chicken tenders (however many you need to feed your crowd)
Italian dressing (I use fat free.)
Bacon--cooked until crispy and crumbled or chopped
Shredded cheddar cheese

Marinate the chicken in the dressing.  Grill chicken on outdoor grill or grill pan.  Once cooked, topped with bacon pieces and then cheese.  Put in 350 degree oven until cheese is melted.  Enjoy.


It does not get much easier than that, and this is a very family friendly meal.  The Hubs and the kids love this and eat it without the dreaded "How many bites to I have to eat?" questioning.  haha  I have eaten this with rice and peas as seen above, pasta with Alfredo sauce, hash brown casserole and beans, pretty much anything.  Give it a try--you won't be disappointed.

Thursday, April 10, 2014

Pinterest Recipe Thursday {The Easiest Brown Rice}

Ok, I confess.  I did not find this recipe on Pinterest.  I actually found it in the old cookbook that my elementary school sold as a fund raiser when I was growing up.  There are approximately a bazillion different ways to make this, but I will share the way I make it.

I will start with the ingredients.  They are all items that you either already have on hand or can easily add to your pantry on a regular basis.  And there's only four:  a can of beef consume, a can of french onion soup, butter, and rice.


The Easiest Brown Rice

1 can beef consume
1 can french onion soup
1/2 stick butter
1 cup rice

 Ok, I have another confession.  When I made this and took the pictures, I misremembered the recipe and actually used a whole stick of butter instead of half a stick.  But I think this just shows the versatility of this recipe.  It's hard to mess it up.  So, if you go to make it, your casserole may look a little different from mine if you follow the recipe.  Personally, I didn't notice a difference taste-wise, so I plan to use just half a stick of butter when I make this in the future.  Why add the extra fat and calories for no taste improvement?

So anyway, I just drop the half stick of butter in the 9 x 9 pyrex dish and put it in the oven to melt while the oven is preheating.  I removed the pan of melted butter, pour in the rice, and stir it up some to coat the rice in the butter.


Then I poured in the cans of consumme and soup and stir it up again.  The rice sinks to the bottom, but it soaks up all the yumminess while it cooking, so the rice doesn't stay on the bottom.  (This was when I noticed that maybe I had put too much butter.  You can see the oil floating here.  It usually looks darker than this after adding the canned items.)


Bake it at 350 for about 45 minutes or until the rice has soaked up the liquid and is done.  I usually dig a fork into the middle and just taste it.  If the rice is no longer hard, it is ready to serve.  You can see where I had sampled some in the picture below.


This rice is a hit everywhere I take it, and my family enjoys it when I make it with dinner.  On this particular night, I served it with smothered chicken and green peas.  Yummy!


I will share the recipe for Smothered Chicken next Thursday.  It is also very easy and always at hit with my family.

Update:  You can read about that delicious Smothered Chicken here.

Thursday, April 3, 2014

Pinterest Recipe Thursday {Baked Shrimp and Grits}

I recently had a friend post on Facebook that she had resolved to try one of the recipes she has pinned on Pinterest at least once a week.  I thought that was a GREAT idea, so I have also resolved to try more new recipes.  This week I made Baked Shrimp and Grits from oystersandpearls.net, and it was a true success.

Baked Shrimp and Grits:

6 cups of water
1.5 cups of dry quick cooking grits
6 Tbsp unsalted butter
1 pound block of sharp cheddar cheese, shredded
2 tsp Lawry's Seasoning Salt
1/2 tsp hot pepper sauce (I leave this out.)
2 tsp salt
1 tsp garlic powder
3 eggs beaten
Shrimp (frozen or fresh)

Bring the 6 cups of water to a boil and add the grits.  Cook 5-7 minutes or until thickened.  Remove from heat and add the butter and cheese.  Stir until melted.  Add the Lawry's, salt, garlic powder, and hot sauce (if using) and stir to combine.  Once it has cooled a bit, slowly fold in the beaten eggs.  Pour this mixture into a greased 9 x 13 pan.  Lay the shrimp on top of the grits and bake at 350 for 45-60 minutes or until browned on top and the middle has set.

I used frozen shrimp and they cooked up perfectly.  I just wish I had had more, but then again, to me you can't have too many shrimp!  Here is how it looked going into the oven.


And here is how it looked coming out.  About half way through the cooking process, I used a fork to push the shrimp down in the grits to keep them from getting too done.  I wish I had dome this before putting it in the oven.  I think it would have helped the grits kind of rise up around the shrimp.  And I am pretty sure I cooked mine for about an hour and 15 minutes.  Don't let that "45 minute" thing fool you--it will take much longer!


I served mine with a salad topped with my homemade Olive Garden copycat dressing, and it was a really delicious dinner.  Ok, so my kids weren't wild about it, but the Hubs and I enjoyed it.


And I will also say that the left overs and delish as well.  One of the many great things about his recipe is that it is good any time of day.  It makes a really satisfying breakfast, as well as lunch and dinner.

Enjoy!

Monday, January 27, 2014

Easy Chicken Pot Pie

I have been in a serious cooking frenzy lately.  I am on an intense mission to both lose weight and save money.  Combine those two and you get cooking and eating at home.  A lot.  And so I have been sharing lots of recipes.  I have one more for you that has been a staple in our home pretty much since we got married--Easy Chicken Pot Pie.  It is actually a combination of two recipes that I got from two different friends--the filling from one and the crust from the other.  I always loved friend J's chicken pot pie, but she makes her crust from scratch.  By "made from scratch" I mean cutting in the shortening, roll it out, the whole ball of wax.  It is flaky and delicious . . . and a lot of work and a mess to clean up once you are done.  Another sweet friend shared her chicken pot pie recipe as part of a game at one of my bridal showers.  Her filling calls for eggs which I do not love, but the crust could not be easier.  So I decided one day to combine them and see what would happen.  The result was heavenly, and I have been making it ever since.  Here are the ingredients:


Easy Chicken Pot Pie

Filling:

1 can of chicken
1 can of cream of chicken soup
1 can of cream of potato soup
1 can of mixed vegetables (or half a bag of frozen mixed veggies)
1/2 cup of milk

Crust:

1 stick of butter melted
1 cup of milk
1 cup of self-rising flour

Combing the filling ingredients and pour into baking dish.  Combine ingredients for crust and pour it over the filling.  Bake at 350 degrees for 45-60 minutes.

You read that right--you just pour the crust over the filling.  Much like those peach cobbler recipes wear the crust rises to the top, this crust looks like pancake batter, stays on top and browns up nicely.  Here is the before and after:


Yep, that's it.  It could not be easier.  This recipe is a Go-To recipe for me for many reasons.  One, all of the ingredients are either pantry items that I can easily keep on hand or they are household staples that everyone has like milk and butter.  Two, I can throw this together when I have forgotten to pull meat out of the freezer to thaw.  Three, my kids LOVE it which means it is an easy way to get vegetables in them.  Four, it is the meat, the sides, and the bread all in one.  I usually throw together some pear salads or peach salads and call it a day.  And don't be turned off my the canned chicken.  I am not usually a fan of canned meats, but once everything gets mixed in, you can't even tell it is canned.  But if you are real particular, you can always pre-cook some chicken.  I like the ease of just opening the can.


For anyone who cooks for a family, this is a no-brainer.  I have made this for potlucks and friends who had been in the hospital, and it is a hit every time!  Enjoy!

Wednesday, January 15, 2014

Crescent-topped Cheeseburger Casserole

My kids are notoriously inconsistent when it comes to mealtime.  I can make a dish on Monday and the kids will gobble it up.  I can make the same dish the next Monday and they will hardly eat it.  It can be pretty frustrating.  But this is one dish that (to date) they have consistently eaten pretty well every time I have made it.  I originally found the recipe somewhere online during a night of desperation when I had ground beef and pretty much nothing else and needed a quick, easy supper.  It did not disappoint, and has been added to my regular dinner time rotation.  I did have to adjust it because it doesn't make enough for my family.  Below is my adjusted recipe.

Crescent-topped Cheeseburger Casserole

2 lbs. ground beef
3/4 cup of water
1 cup of ketchup (plus more if desired)
2 Tbsp prepared mustard
1/4 tsp black pepper
7 slices American cheese
1 can of crescent rolls
1 egg, lightly beaten
sesame seeds

Brown and drain the ground beef.  Combine the beef with water, ketchup, mustard, and pepper.  Pour it into the bottom of a 9 x 13 pan.  Place the cheese slices evenly over the beef mixture.  Roll out the crescents to make them fit over the beef and cheese.  Brush the egg over the crescents and sprinkle sesame seeds over top.  Bake at 375 for 18-23 minutes until beef is bubbly and crescents are browned and done.

I have found that putting the cheese and crescents on the top is the hardest part of this recipe.  The cheese melts and spreads out nicely, so leaving some empty spaces is ok.


And honestly, I don't usually roll out the crescents.  Sometimes I just stick them on there and tear off pieces and replace them to make it fit, but for picture purposes I rolled and cut this time.


And the finished product is so yummy.


 The original recipe called for chopped onion and chopped pickles to be added.  I don't like pickles, and for simplicity's sake, I don't add a step of slicing and chopping to the recipe.  You can pretty much add whatever you want to this that could fall into the 'burger' category and it would be great.  I usually serve it with green beans or peas to add a veggie, but you could easily play up the burger thing with roasted potatoes as fries, slaw, or potato salad.

Enjoy!


Friday, January 10, 2014

Crock Pot Potato Soup


Oh, my goodness!  I made the most delicious Crock Pot Potato Soup Sunday, and I just have to share it.  It is super easy and absolutely scrumptious!!  And with the crazy cold weather we have been having lately, it has been perfect for lunch!

Crock Pot Potato Soup

30 oz bag shredded frozen hash browns
3 - 14oz cans chicken stock
1 can cream of chicken soup
8 oz cream cheese

Put the hash browns, chicken stock, and canned soup in crock pot and cook on low about 8 hours.  During the last hour in the crock pot, add the cream cheese and let it melt.

That’s it!!!  Could it be any simpler???  And I had a friend that said she has made this without the can of soup.  I think next time I make it, I will try it without the canned soup.  Leaving it out certainly would make it healthier and less ‘processed.’  I have been eating this for lunch with either a salad or a sandwich since Monday and was able to get 5 serving out of the recipe with each serving being 303 calories.  Again, leaving out the canned soup would make it less than 300 calories per serving!


As you can see, I like to top mine with just a pinch of shredded cheddar, but it would also be great topped with bacon crumbles or green onions.

It is so yummy.  You've got to try it!